
Here’s my detailed breakdown of all the gear I used on my 2018 SOBO thru-hike of the Pacific Crest Trail, from Canada to Mexico: Here’s what worked well and what didn’t, plus a recap of my budget, tips for sticking to your own, and some other post trail thoughts.

Hey everyone! Before we get started with breaking down my gear list, I just want to take a moment to thank all of you who have been with me since the beginning, reading up on my journals when I post them and following along via Instagram and Facebook. I also want to apologize for getting so far behind on my posts. It’s incredibly difficult to keep up with writing when you’re on the trail, something I was well aware of when I thru-hiked in 2016, as hiking takes up all of your time. Yet, I somehow didn’t learn my lesson and continued with overly descriptive posts.
Oh well.
As of right now, I’m not sure if I’m going to continue with my trail journals on this site (gear reviews and other advice topics will remain), and I’m considering a shift to vlogging on YouTube. In all honestly, I’m not crazy about YouTube, but it seems that it is the most popular way be heard regarding a trail. I’m not really trying to get popular, as this is more of a hobby, but I do want to reach more people (in particular, women) who are too timid to hike solo or give long distance hiking a go. I’m also not sure if I’m up to the constant abuse people get from trolls on that platform, so really everything is up in the air right now. Feel free to give me your opinion on the matter, either in the comments section here or via email.
Also, I want to say a huge thank you to everyone who helped me achieve my fundraising goal with The American Foundation for Suicide Prevention. It meant a lot to me, seeing those donations trickle in as I hiked, and it certainly kept me motivated when I was feeling low.

Okay, OKAY, enough rambling and mushy stuff. Here’s the gear…
For my original PCT gear list, click here.
For my original clothing worn list, click here.
The Big 3: Shelter, Sleeping Bag and Pack, Plus Accessories
The three heaviest and probably most important pieces of gear, plus the accessories that go with them.

Six Moons Designs Lunar Solo Tent, 24 oz.
Description: A single wall, teepee style one person tent that uses a trekking pole to pitch.
The Verdict: This was a great tent, and I was really pleased with its performance. It held up well in high winds, and the bathtub floor kept me dry in the rain. It takes some time and effort to get the perfect pitch since it’s not a free-standing tent, but once you nail it, the tent goes up pretty fast in camp. I found the key to getting the perfect pitch is to peg out the back end first, pitch with trekking pole, and then make adjustments from there.
Since it’s a single wall shelter, there will be condensation on some nights. However, I never really struggled with my sleeping bag getting damp, or the rest of my gear for that matter. The condensation pretty much stayed put on the inside wall. Another thing I really liked was how spacious it was on the inside; I could fit all of my gear in the tent beside me and never had to leave it under the vestibule outside. Bonus points for the low-key green color that blended in with my surroundings, something that gives me a sense of security when I’m camping. It packs down small, which I need due to using smaller capacity packs, but only if you use a compression style stuff sack (see below).
Also worth noting: My trail partner, Cheesy Puff, who had the same tent as me, had problems with the zipper failing after the halfway point. Mine started to stick as well towards the end, but was nowhere near the awful experience she had. Zippers on the PCT fail, so you need to be diligent at keeping them clean. This can be done with alcohol wipes or the various brands of lubricants found on the market. I used alcohol wipes and sometimes baby wipes to keep it clean and functioning.
I will likely use this tent again, especially in areas that see a lot of inclement weather (like the PNW, where I currently live).

Zpacks Tall Dry Bag, 0.7 oz.
Description: A roll top dry bag made from DCF material (formerly Cuben Fiber), 5.7 liters capacity.
The Verdict: I used this to store my tent, inside of my pack. The material seems flimsy, but it was strong enough and didn’t develop any holes. This may be because it was kept exclusively inside of my pack at all times when I was hiking. I can’t really attest to whether it was waterproof or not, since it only rained a few times on my entire thru-hike, and I used a trash compactor bag as a pack liner. I chose this dry bag because it’s ultralight weight and has the roll top, since my tent from Six Moons came with a drawstring bag that didn’t really compress it down enough. I was pleased with it for the most part, but nearing the end of my journey the plastic buckle broke. I was still able to roll and clip it despite it breaking, however, it would sometimes come undone midday and lose compression.
Zpacks sells buckles to replace any broken ones, but I found one at a sewing and craft store that will work just fine.
MSR Ground Hog Stakes, 8 Total, 4 oz.
Description: Aluminum tent stakes, weighing in a .5 ounces each.
The Verdict: I wasn’t crazy about these. They don’t have hooks, instead utilizing notches to hold nylon chord and tent loops in place. I don’t think the notches are efficient, and often if it was windy the tent loops would slip off the stakes. I would randomly find shepherds hook stakes in hiker boxes, or sometimes accidentally left behind in campsites, so I started replacing the MSR stakes one by one via this method. I likely won’t use them again.
Tyvek Ground Sheet, 6 oz.
Description: A Tyvek sheet, usually used to waterproof new buildings under construction, purchased on eBay and cut to fit the underside of my tent.
The Verdict: I like Tyvek as a ground sheet; it’s waterproof, inexpensive, sturdy and can be used as a hitchhiking sign for when you need to go into town. The downside: it’s bulky, and pretty darn noisy when it’s brand new. I always toss mine into the wash machine to de-crinkle it a bit, so it doesn’t shatter the solitude when I’m laying it out in camp. Use a Sharpie to print out town destinations and ease hitchhiking. I like mine to read “Hiker to Town” and “Hiker to Trail.”
Even when well-worn from the trail and folded up, it takes up a lot of space inside of your bag. I won’t be using it again on my next thru-hikes, and have already replaced it with a sheet of Polycro, which weighs half as much and folds down smaller. I will say, that Tyvek is incredibly durable and my one sheet lasted the entire journey with no holes. We’ll see how the Polycro performs.


Therm-a-Rest Mira HD 15 Sleeping Bag, 28 oz.
Description: Women’s 15 degree mummy bag, with 750 fill duck down, and made to attach to the Therm-a-Rest Neo Air Sleeping Pad with the use of two straps on the bottom of the bag.
The Verdict: I like this bag, and it kept me warm for the most part. The only time I ever struggled with being too cold was when I was in the High Sierra, and the temperatures got pretty low at night. Once I coupled the bag with a liner, I never had any issues. I bought this bag at REI on clearance, during dividend season, because it’s as ultralight as most of the cottage companies and was half the price with no lead times. I’m all about supporting cottage companies, but a girl’s got to watch her budget too. I also really enjoyed the reflective lining for extra heat, and the encased foot area.
In an ideal world, I would be warm enough using an ultralight quilt, but that will never EVER be the case with me. I’m a cold sleeper, and any draft would likely result in hypothermia. For now, I’m going to keep using this bag on future thru-hikes.
Note: This sleeping bag has been discontinued.

Zpacks Medium-Plus Dry Bag, 0.8 oz.
Description: A roll-top dry bag made of DCF material, 8.2 liter capacity, and used to store my sleeping bag.
The Verdict: As with the last dry bag from Zpacks (see above), it did its job by keeping my sleeping bag dry and compressed. I did not have an issue with the buckle on this bag breaking. I will continue to use this on future trips.
Zpacks Arc Blast Backpack, 21 oz.
Description: 55 liter capacity pack, made with DCF and featuring a ‘flexed arc’ frame and mesh outer pouch. Holds up to 35 pounds. My pack was a size small torso, with an extra small hip belt.
The Verdict: I was really pleased with this pack. I loved the flexed arc frame, which allowed airflow to my back and thus prevented chafe. It also seemed to distribute the packed weight properly and didn’t give me much pain in the shoulders or hip area. I didn’t go for any of the extras that you can order with this pack, such as additional shoulder or lower lumbar padding, hip belt pockets, roll top closure side straps, etc. I didn’t really feel that any of these things were necessary, and I still believe that. I hate extra pockets, and that’s one of the reasons I no longer rock an Osprey pack; just too many places for things to get lost. The mesh outer pouch was more than enough, and I kept my things that I need regularly accessible there, such as snacks, my wallet, sunscreen, garbage and my trowel. The mesh is a bit fragile (it is mesh, after all), and developed a few small holes over time, but this wasn’t a big deal to me. Also, the mesh on the arc frame developed holes where my boney shoulder blades were likely rubbing, but again, not a huge issue.
The side pockets were spacious enough to hold two Smartwater 1.5 liter bottles, plus a couple of snacks.
My only complaint is that it didn’t fit a bear canister very efficiently, and I often struggled to fit it inside of my pack properly. Other hikers that I met with the same pack simply strapped the bear can on top, but I didn’t want something so bulky near my head, with its contents shifting around while I walked. Once I chipped away at my food inventory inside the canister, and I was able to fit other gear inside of that, it made for an easier time. But at 55 liters, I don’t think that this pack is really meant to hold a bear canister. Thankfully, when on the PCT, carrying such a bulky item is only temporary.


Zpacks Shoulder Pouch, 0.5 oz.
Description: A shoulder pouch that attaches to the shoulder strap of your pack. Made with DCF, and big enough for a phone and Chapstick.
The Verdict: I loved this, but a week from finishing the trail, the elastic bands on the back that are used to attach it to your shoulder strap, finally broke. I used this to store my phone, so it would be readily available to snap pics on the fly and consult my route finding apps and digital maps. I can likely repair this on my own with my very basic sewing skills, so it may remain in my gear inventory for now.

Sleep Gear and Packed Clothing
Everything I used to sleep in, or on, at night.
Therm-a-Rest Women’s Regular NeoAir XLite Sleeping Pad, 12 oz.
Description: An inflatable sleep pad, approximately 2.5″ in height. Rolls up small, to about the size of a soda can.
The Verdict: Honestly, this is one of my favorite pieces of gear. It’s so light and compact, it can’t be beat. I’m a side sleeper, and can’t do those thin foam pads or I’ll have excruciating hip pain through the night. The downside is that it’s noisy when you’re rolling around on it, but it makes up for it in being ultralight and comfortable. Also, there was an unfortunate event when I inflated it in the extreme heat of central Oregon, it continued to expand and one of the inner chambers collapsed, resulting in a bulge in the center of my pad. Not a big deal, simply flipped it over and never noticed it when I was sleeping. This, of course, means that the pad as a whole is slightly weakened, but as long as I continue to take care of it I don’t think I’ll be needing a few one for a while.
Obviously, having an inflatable pad means there’s a possibility of puncture, but mine survived the entire PCT, plus my trek across Scotland and everything in between. If you’re smart about protecting this pad, punctures won’t be an issue; always inflate inside of your shelter, or if you’re cowboy camping, use a ground cover and sweep away any debris underneath. I always carried a few alcohol wipes and a patch in my toiletries kit, just to be on the safe side.

Sleep Clothes, 14 oz.
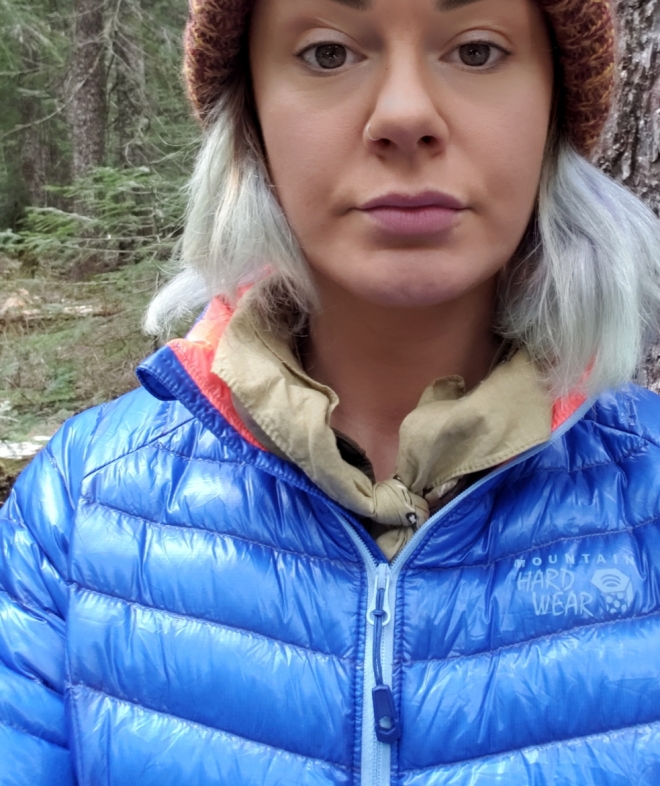
Description: Helly Hansen HH Warm Long Underwear Bottoms (merino wool blend), Darn Tough Vermont Hiking Crew Socks (merino wool), Mountain Hardware Ghost Whisperer Down Jacket (no hood), Dakine Veronica Beanie (acrylic knit) and Merino Wool Buff.
The Verdict: I was pretty happy with this whole setup. Last minute I decided to ditch the Smartwool sleep top, because I thought it was a bit overkill. I’m glad I did, because not only did it save weight and cut down on bulk, but it was warm enough most nights to where it was unnecessary. If I felt cold, I simply slept in my Ghost Whisperer Down Jacket. I almost always slept with my beanie on, as you lose most of your heat through your head, and the Merino Buff kept it in place.
I also had originally set off with thick, REI brand wool socks to sleep in, but my mid-weight surplus Darn Tough socks worked out fine. I usually slept with my Helly Hansen bottoms pulled on over my hiking leggings, and peeled them off if I got too warm.
Moral of the story: layers work, but there’s a fine line to over packing, so make them count by choosing the most efficient ones to keep you warm.

Outdoor Research Helium II Rain Jacket, 5.5 oz.
Description: A wind proof and water proof minimalist jacket, made from breathable ripstop nylon and 2.5 Pertex Shield waterproof laminate. Mine was a women’s size small (5’7″, 120 lbs. and 34″ chest).
The Verdict: Hands down, one my best pieces of gear. I love it! It rained very little on the PCT this time around, but when it did, I stayed dry and warm, but never felt clammy. I wore this jacket nearly everyday as a light layer in the mornings and evenings, and as a windbreaker in the desert. The zipper failed sometime in southern California, and after I contacted the company, they sent me a new one, hassle free and even before I had sent the old one back. That’s a great warranty, and a wonderful company that I can get behind!

ULA Rain Skirt/Kilt
Description: An ultralight rain skirt made from silicone impregnated nylon.
The Verdict: Sent this home almost straight away, as it seemed as though rain was going to be sparse on this trip, and it turned out I was right for a change. On the days that I did see inclement weather, it was a light sprinkle and really didn’t warrant the need for a rain skirt; I still just wore shorts and was perfectly fine. I will say, though, that I love this piece of gear, and wish that I had it during my NOBO 2016 thru-hike when I had arrived in Washington. I hate rain pants, due to the sauna effect I get in them, and will never go back; the ULA rain skirt is truly the way to go!
Clothing Worn
All the clothing I wore during the day, while I hiked, and which does not count towards base weight.

REI Sahara Pattern Long Sleeve Shirt
Description: A long sleeve, women’s hiking shirt. Made from a quick dry Nylon blend material. I wore a size small, which was fairly loose-fitting. This particular pattern is discontinued, but REI has other prints and colors available in the Sahara series.
The Verdict: My favorite hiking shirt so far. I loved the soft and light material, which quick dried when saturated with sweat, kept me cool, but also was a nice light layer in the chilly, early morning hours. It features roll tab sleeves and two large breast pockets, both of which I really appreciated. This shirt offered great sun protection, a must on the PCT as I absolutely hate the greasy feeling of sunscreen on my skin (layers are more efficient anyway). Most importantly, it held up the entire trip; no holes or tears, so it will likely remain an important staple in my gear inventory.
Bonus: I received loads of compliments with this shirt, probably because it was a nice olive-green color and not the typical pastel ‘girly’ colors that are far too common in women’s hiking gear. Gear brands take note: women are fed up with your ‘shrink it and pink it’ logic when it comes to performance clothing. Time to modernize!

Shorts
Description: I went through three pairs of shorts on this trip; Under Armour Running Shorts, Champion Compression Shorts and Reflex 90 Degree Shorts (Amazon).
The Verdict: I first started the trail in the Under Armour shorts, but they didn’t fit me quite right and I ended up switching them out for the Reflex 90 Degree shorts when I went home for the night at Stevens Pass. Both these pairs had pockets, but they were quite small and I didn’t utilize them much.
The Reflex 90 Degree shorts were a cheap pair I bought on Amazon several months prior to my trip, and I wore them from Stevens Pass in Washington, all the way to Tehachapi in Southern California. I liked them because they were comfortable and soft, and had a drawstring waist. However, they weren’t quick dry and by the time I reached Kennedy Meadows, they were wearing pretty thin in the butt and crotch areas. I knew I’d have to replace them, so I had my Champion shorts sent in my next resupply box to Tehachapi.
The Champion Compression shorts were fine, although they rode up often, so I found myself adjusting quite a bit. I do like the fact that I can comfortably wear these under my leggings while hiking, without getting the lumpy butt effect. They were also quick dry, so easy to rinse out and then immediately wear when they needed a wash.

Wild and Roaming Sitka Spruce Leggings
Description: Thick, polyester blend leggings featuring a high waist and stylish print. Full disclosure: I’m an ambassador for Wild and Roaming, a company local to the PNW, where I’m based; my review is my honest opinion regarding this product.
The Verdict: These leggings are pretty great. They are thick and sturdy, and never showed any wear and tear. I mainly wore these in the evenings, as a sleep layer when it was too warm to wear my wool bottoms, and in the chilly morning hours when I first set out for the day. The high waist provided an extra buffer between my skin and my hip belt, which helped prevent further chafe. They’re buttery soft and comfortable, and will continue to be used on future thru-hikes.

Altra Lone Peak 3.5 Trail Running Shoes
Description: Trail running shoes featuring a wide toe box and zero drop sole.
The Verdict: Wow, what a game changer; these are popular with thru-hikers for a reason! I loved the wide toe box, which has me wondering why the hell most running shoe brands are so narrow in the toes? I will say that they aren’t the most stylish looking shoes, but they are ideal for long haul walking. I was skeptical at first with the zero drop soles, but quickly changed my mind after putting in long days. I have high arches, and never once struggled with plantar fasciitis. Blisters were minimal, due to the highly breathable mesh uppers, which also made the shoe quick dry.
A frequent question I get regarding wearing trail runners is why I choose them over hiking boots. Here’s the best reasons that I can give: Boots need breaking in, which takes time that I don’t have on trail. I’m not going to allow my feet to suffer in pain and blisters for a couple of hundred miles to break in boots. Also, boots are never EVER fully waterproof, despite brand claims and fancy GoreTex treatments. An entire day spent walking over twenty miles in the rain will result in wet feet, no matter what you wear. When you’re wearing a ‘waterproof’ shoe or boot, and it gets wet, it’s only going to take an eternity to dry out again. Trail running shoes, like the Altra Lone Peak, that aren’t treated with a waterproofing agent, will dry quickly from your body heat when worn.
I went through four pairs total of the Altra Lone Peaks, averaging over 600 miles on each pair before replacing them. I never wore a hole into a single pair of these shoes, but replaced them when the tread and soles were worn thin.
Altra just recently released the 4.0 version of the Lone Peak, and the shoe is about $120 on the market. However, I recently found the 3.5 model on Amazon for around half price and quickly bought up four more pairs to see me through the next thru-hiking season.

Dirty Girl Gaiters
Description: Lycra running gaiters that attach to your trail running shoes to keep the grit out. Bonus: funky prints and Altra running shoes already come with the gaiter traps to hold them in place!
The Verdict: A favorite piece of gear that I won’t hike without (I mean, I will, but it’s better to have them). They do exactly as they claim, keeping sand, dirt, pebbles and other uncomfortable grime out of your shoes. I’ve been using these on every thru-hike and day hike since 2016, and I will continue to use them in the future. My pair wore a hole in them on the inside near the ankles somewhere in southern California, but that won’t dissuade me from using them or getting a new pair. The PCT is a long, strenuous trail, after all. Wear and tear happens.

Darn Tough Hiking Socks
Description: Merino Wool blend hiking socks.
The Verdict: Another fan favorite. I love my Darn Tough Merino Crew cushioned hiking socks, and I love the warranty on them even more! Once you wear through a pair of these, simply fill out a warranty claim online, send in the damaged pair, and they’ll send a replacement. Just be sure to have a backup pair to see through until the new pair arrives. I hiked with three pairs total, rotating between two for hiking and using one for sleeping. They are durable, moisture wicking and quick dry, and prevent blisters from forming. I will probably never use another brand of socks on any hike. These are solid gold.

Outdoor Research Sun Gloves
Description: Lycra fingerless gloves to protect your hands from sun exposure.
The Verdict: Loved them, but not very durable. By the time I reached Oregon, they had a hole in the right hand (my prominent hand). And at the end of the trail, they were in shreds. I really can’t expect much less from a delicate material though, and still continued to use them despite the holes. They did what they were meant for, preventing sunburn on the tops of my hands, as well as preventing calluses from forming on my palms from my trekking poles. I tried desperately to find another pair online and in REI, but they are quite possibly discontinued. I’m holding out hope that Outdoor Research will release an updated version this coming hiking season.


Underwear
Description: Hurley Quick Dry Garden Tri Surf Top and ExOfficio Women’s Give-N-Go Sport Mesh Hipkini
The Verdict: I went with a swim top for a bra for a very specific reason: I needed a triangle cut so that my breasts wouldn’t be smashed together (like a regular sports bra would do) creating uncomfortable chafe in between the girls; the triangle cut allows separation and breathability. This particular bikini top is for surfing, and therefore designed to stay in place, and without ties that might come undone. Since hiking is fairly low impact, I didn’t need a bra that provided much compression.
I loved this top, up until I lost too much weight to wear it. Sometime in Northern California, I lost so much weight that I couldn’t properly fill out the cups anymore, and had to switch to a regular Nike sports bra (which I didn’t love). Unfortunately, weight loss happens on the trail and the first place I lose fat is my boobs. Bummer.

As for the underwear, this is something I very rarely wore, except when I was menstruating or going for a swim (then it was used as a bikini bottom). I hate wearing underwear when I hike, because it rides up and makes my butt sweaty, creating chafe. This particular brand was ultra breathable and quick dry, so I can’t complain too much. I’d definitely say it was worth the investment, and I’ll probably take them on future trips.
Trucker Hat
Description: A mesh cap with a brim to protect my face from the sun. I got mine from Runner’s High Herbals, another brand that I currently represent.
The Verdict: I love that the mesh of a trucker hat lets my scalp breath in hot weather. A brim is a necessity on the trail, to prevent my face from burning and to keep the sun out of my eyes. I briefly flirted with a wide-brimmed straw hat that I had purchased in Portland from an Army Surplus store, but hated every second of wearing it. It proved that it can’t handle the rigors of thru-hiking, constantly grazed the top of my backpack as I walked, and became mishapen. It promptly found a new home in the trash once I got to Crater Lake.

Sunglasses
Description: An under $20 pair of polarized shades I bought on Amazon.
The Verdict: There’s a law of nature when it comes to sunglasses and thru-hiking; if you buy an expensive pair, they will end up broken or lost. I’ve seen it on every thru-hike: a note tacked to a sign at a trail junction describing a lost pair of Ray-Ban sunnies, along with contact information for if they’re found. I’d rather not lose a $150 pair of sunglasses, and just stick to a cheap pair that I won’t have any heartache over. My Amazon specials worked out just fine, although they were thoroughly scratched up by the time I finished.
Fleece Gloves
Description: A pair of black polyester fleece gloves that I found on the ground in the middle-of-nowhere Scotland.
The Verdict: They’re warm, but I didn’t have much use for them until I reached the High Sierra, and the mornings were freezing cold. I had sent them home early on, and then had them returned to me via a resupply box in California when I needed them again.
Bandana
Description: Just your basic run-of-the-mill cotton bandana.
The Verdict: These are so handy, I always need one for a thru-hike. I mainly use it for sponge bathing in creeks, draping over my neck to prevent sun burn when the sun is to my back, as a face mask in a wildfire area, and even as a towel when I get a random surprise shower on trail. They can be used in a pinch for first aid needs too.

Cooking Gear, Food Storage and Water Purification
What I used for meal preparations, keeping my food safe from critters, and making sure my water was safe for drinking.
MSR Titan Tea Kettle
Description: A titanium cook pot.
The Verdict: I drank the ultralight Kool-Aid, and I’m sorry. From Stevens Pass in Washington, I left my cookware behind and cold soaked all the way to the end. From the beginning of my trek, the weather was downright hot, and I honestly didn’t miss the warm meals very much. I did, however, miss my hot coffees in the frigid High Sierra mornings. Although I found that when I did get a chance for a piping hot cup of Joe when I got to town, it was a hugely appreciated treat.
I learned a thing or two about cold soaking, mostly that some foods are better than others (avoid pasta at all costs if you go with this method). I’m still going to keep my cook pot, as I haven’t given up completely on cooking hot dinners in the wilderness. At this point, I’m not sure what the future holds for me regarding cooking or cold soaking, but I think it will depend largely on the time of year or terrain.

MSR Pocket Rocket 2 Stove
Description: A tiny (dare I say, pocket-sized?) folding backpacking stove that screws onto a fuel canister
The Verdict: Like I said in the above review of my cook pot, I went with the cold soaking method for cooking and didn’t have a use for this, so it stayed home. I still love it though, because it’s light and compact.
Sea to Summit Alpha Light Spork
Description: A spork made from hard-anodized aluminum alloy. Weighs less than one ounce.
The Verdict: Does the job by shoveling food into my mouth, so no complaints here. I chose this because it’s metal, after having a few plastic sporks break while I was eating.
Talenti Gelato Jar for Cold Soaking
Description: The jar from an ice cream brand, chosen for its screw top lid and clear plastic so you can see your food.
The Verdict: I can see why this is the go-to container for cold soaking. The jar is the perfect size: it fits one Knorr Side perfectly, or two packets of ramen. The clear plastic allows you to see if your food is done, and the screw top prevents any leaks. It fit perfectly in the side pouch of my backpack. Bonus is you get to eat a pint of ice cream when you need to replace the container (they get pretty grimy after 500 miles or so).
Pro tip: get the sorbet if you’re trying to eat a pint in one sitting (like sitting outside a gas station). Eating the dairy rich gelato can be difficult on your gut and make you feel uncomfortable, especially if you’re trying to hike out afterwards. The fruit sorbet is refreshing on a hot day and much easier to digest.

Sawyer Squeeze Water Filter Plus Coupling Attachment for Cleaning
Description: A small and lightweight water filter that screws to the top of (most) water bottles, or the bags that are included.
The Verdict: Another favorite that I can’t thru-hike without. I use this filter with Smartwater bottles, but I know that it will fit on the one liter soda bottles too. I hate the included bags, as they’re too difficult to fill in standing water. This filter is so great, it blows those bulky pump filters out of the water. Simply screw it to the top of a bottle, and squeeze the water through into your clean drinking container. As long as you keep it clean, it’s fast and efficient. I bought the coupling device for cleaning, to make things a little easier and lighter, instead of using the included syringe for back flushing.


Ursack Major Bear Bag
Description: A thick food bag made from a material called ‘Spectra’ that is apparently bear proof, although it is not an approved storage method in the backcountry areas of the National Parks.
The Verdict: I like my Ursack, but I can’t really say whether or not it’s bear proof. Living in Washington State, however, has me appreciate it for being rodent proof (i.e. the little buggers can’t chew through it). Once I got to Sonora Pass, I had to replace this with a Bear Canister, as per the backcountry rules for Yosemite and Sequoia Kings Canyon, so I sent it home from there. After the High Sierra, I instead just stored my food in a sturdier-than-average plastic grocery bag, which seemed sufficient.

Electronics and Gadgets
Lights, camera, hike! Everything I used for illumination, taking photos, powering up, and all the other things in between.
Black Diamond Carbon Cork Trekking Poles
Description: Carbon trekking poles with cork handles, and a flick lock to keep them the length that I prefer.
The Verdict: I didn’t know what category to put these under, so here they are under ‘gadgets’. These were an important part of my gear inventory, as they kept me upright a lot, aided me in precarious descents, and were used for pitching my shelter at night. I’ve had these bad boys since 2016, and they’ve accompanied me on every thru-hike since. They’re sturdy and reliable, and I’m probably going to cry the day they die.

Swiss Army Knife
Description: The classic multi-tool that fits in your pocket, with two small blades, small scissors, a corkscrew, bottle opener, and can opener.
The Verdict: Tried and true, always great to have on hand. I mostly use the blades and the bottle opener. It’s certainly a must-have.
Luci Aura Inflatable Solar Lamp
Description: An color changing inflatable solar lantern, for keeping the bogey man away.
The Verdict: I love this little lantern, and it stayed with me from start to finish. I guess this would be considered my luxury item. You can put it on the color change setting or pick one color you’d prefer to illuminate the inside of your tent. I’d often use the red setting while I ate breakfast and got ready inside of my tent in the wee morning hours. It will last about half of the night before going out, and then simply strap it on top of your pack while you walk and let it charge under the sun.

Nitecore NU25 360 Lumen Triple Output Rechargeable Headlamp
Description: An ultralight headlamp featuring three brightness settings, and a red light.
The Verdict: I was sent scrambling to replace my busted Princeton Tech headlamp just days before I was due to depart on my thru-hike, and found this one at the recommendation of users on r/ultralightbackpacking. I bought this on Amazon, and needless to say, it’s a keeper! I love the different brightness settings, and the red light is bright enough to see at night properly and still not disturb your camp mates. I also really appreciate that it’s rechargeable via a USB cable, so I never have to worry about buying batteries for a headlamp again.
Samsung Galaxy S9+ Smart Phone, plus Silicone Shock Case, Ear Buds & Fast Charger
Description: This smart phone features duel-aperture HD camera and is waterproof. All the accessories I used were the ones that were included with the phone, other than the silicone case.
The Verdict: I love Samsung phones, as I’m much more of an Android gal than an Apple fan (don’t judge). The camera on this phone is phenomenal! See for yourself in the photos below.


The fast charger was just that: fast, charging up my phone in a small span of time. The silicone case prevented my phone from shattering the countless times I dropped it, and the ear buds allowed me to listen to music, audiobooks and podcasts while I walked.
PNY Battery Bank & USB Cables
Description: A battery bank with two USB outputs for charging electronics.
The Verdict: I bought this particular battery pack when I was abroad, but this brand can be found in the States. It’s a bit on the heavy side, but a necessary evil so I can charge my phone and headlamp on long wilderness stretches. It gives my phone 2.5 charges. On the downside, it takes forever for this thing to fully charge up and I’d recommend using a fast charger to do so.
Hygiene and First Aid
For a list of consumables that I pack in my first aid and toiletries kit, see my post here.
The TentLab The Deuce #2 Backcountry Trowel
Description: An aluminum trowel, weighing less than one ounce, and used for digging catholes.
The Verdict: An exceptional pooping apparatus! Truly the only way to master ultralight backpacking and Leave No Trace ethics in one go. I never go hiking without it.

Nail Clippers
Description: The kind of clippers you find near the cash registers at RiteAid for $1.
The Verdict: I always need these. I’m prone to losing toenails in any shoe, so I need to keep things nice and short. Besides, ‘hiker French tips’ are unsanitary and gross.
Variable Gear
The gear I would use only when needed, such as where it’s required or necessary for unique trail conditions.
Sea to Summit Thermalite Reactor Sleeping Bag Liner
Description: A polyester sleeping bag liner that adds up to 20 degrees warmth (F).
The Verdict: It really does add a ton of warmth when you need it. I started using this during the second half of the High Sierra, and then sent it home once I got past San Jacinto in Southern California. You definitely don’t need this for the entire PCT, but I’d recommend using it for the Sierra sections (both NOBO and SOBO) and for northern Washington State (NOBO only).
I chose this over a silk liner because it’s stretchy, unlike the silk liners, and doesn’t get twisted up if you’re a free-style sleeper like myself.
C.A.M.P. USA Corsa Ice Axe
Description: A very lightweight ice axe made from aluminum alloy.
The Verdict: I carried this from Harts Pass to the Northern Terminus, and then all the way to Stevens Pass when I couldn’t mail it home from Stehekin (the post office didn’t have a box that it would fit in). I never once needed it, despite being warned by a few rangers that I would. There was snow in some of the higher passes, such as Cutthrout and Fire Creek Pass, but they were fine without the need of extra snow gear (didn’t take my microspikes, trekking poles were fine for safe passage). I left Harts Pass on my thru-hike just shy of two weeks after the USDA Snotel reported the snow level at 0″, a decision I would stand by today and recommend to any future SOBO hiker.

BearVault BV500 Food Container
Description: A bear canister for storing your food, required in the backcountry areas of Lassen Volcanic, Yosemite and Sequoia Kings Canyon National Parks.
The Verdict: It’s heavy, and it sucks to carry, but there’s no getting around carrying it. By law, you are required to protect the bears in National Parks by properly storing your food. My trail partner and I didn’t carry one through Lassen because we didn’t camp there; we made it a point to get through the park in a single day, camping just past the boundary so we wouldn’t have to deal with the hassle of a bear can in this section.
At Kennedy Meadow North, at Sonora Pass, we collected our canisters for the nearly 400 mile stretch through the Sierra, and Yosemite and Sequoia Kings Canyon. I really don’t have anything nice to say about them, except they make a nice seat to park your butt on while you’re having a break or eating dinner. That’s about it. Please be sure to follow the rules, though, since a ‘fed bear is a dead bear.’ You’d hate to be the one responsible for a bear being euthanized, wouldn’t you?
Mosquito Head Net
Description: A bug net that protects your face from getting bit and restores your sanity.
The Verdict: A must have item for parts of Washington when on a SOBO thru-hike. Ditched mine somewhere in Oregon when it got too hot for mosquitoes to be an issue anymore. I didn’t need it again after that.
Note: In my original gear post, I had listed Six Moons Designs Silver Shadow Umbrella and Kahtoola Microspikes as variable gear, but I never used either one on this trip so I’m not including it in my gear review.
PCT Budget Recap
You can read my original Budget Post here.

First off, I want to say that I did really well with my budget this time around, in comparison to my 2016 thru-hike of the PCT. In ’16, I blew past my $5000 budget and had dipped into my savings so I could complete my dream of becoming a PCT thru-hiker. This time, however, thanks to strict budgeting and sending nearly all of my resupply along the way, I only spent $3000 out of the $5500 I had allotted.
So what was the difference between the two separate thru-hikes? On my 2018 SOBO trek, I was more aware of just how much things can cost on the trail, so I had it set in my mind that I wouldn’t stay in as many motels, eat cheaper meals in town when possible, and set a strict budget to abide by when visiting a trail town. It all worked, and I finished with some extra cash in my pocket that is currently going towards my next thru-hike.

Visits to town are inevitably the budget destroyer, so here’s a few rules that I followed to get me through without breaking the bank:
- Buy a meal from the supermarket instead of going out. Even hot deli foods are cheaper than a sit-down meal at a cafe. A whole roasted chicken or Stouffer’s Lasagna, bag of salad mix, and a baguette make an excellent, cost-effective meal. Making sandwiches is also a great way to save, and you get twice as much for your dollar. For breakfast in a motel, buy some fresh fruit, yogurt, and pastries. This is also a great way to eat healthier and get some much-needed nutrition. And of course, it goes without saying, beer bought in a six-pack is far cheaper than a few pints at the pub.
- Share a motel room with another hiker. I shared every room with another hiker. Also, look for hiker discounts at motels in trail towns, and get a room with a mini fridge and microwave so you can buy fresh foods to eat as opposed to going out (see above). Or, better yet, get an AirBnB with a full kitchen and share with a group of hikers.
- Send your resupply. This helps you avoid shopping at overpriced convenience store type markets in small, tourist towns. I once saw candy bars at a resort in Oregon for $2.50 each; that’s highway robbery! Prep your boxes at home, if you can, shopping the sales at your local supermarkets and buying foods that you’ll look forward to receiving down the line. Yes, it costs money to send a box via USPS, however, in the long run you’re saving money and precious time in town. I’ve said this before on other posts: shopping on your zero day sucks! It takes way more time than you’d imagine, and it’s stressful. I’d rather enjoy my day off, lounging poolside at a Motel 6. If you’re resupply box feels short on goods, then you can always supplement it with a few more snacks bought in town. It sure beats spending $100 on junk food from a gift shop that would normally cost you around $20 at home (no joke).
- Check the Hiker Boxes for surplus food and other goods before you go shopping. You’d be surprised what you’ll find in there. I’ve scored full jars of Nutella, beer, snacks, instant coffee, toothpaste, soap, first aid supplies, you name it! I also never once had to buy feminine hygiene products, as I found what I needed in hiker boxes.
- Resupply at the Dollar Store. If you’re going to buy your resupply, look for dollar stores or Grocery Outlet. They’re far cheaper, and they have the same name brand snacks and other goods as the bigger supermarket chains.
- If you’re going to go out to dine, eat at fast food restaurants instead of cafes. I know what you’re thinking; gross. But hear me out! Is there any other place to get more bang for your buck than McDonald’s and Taco Bell? Believe me, when you’re heading into town and you’re calorie deficient and starving, both of those places are going to sound incredible. Embrace this moment in your life when you can eat whatever you want! They all have value meals, dollar menus, free refills on drinks, and the one thing every thru-hiker needs: free WiFi! Plus, you can score some hot sauce packets from Taco Bell to jazz up your bland on-trail meals. If you want something healthier, there’s always the sandwich chains, like Subway. They’ll also have more vegetarian friendly options, too. Cheers to lowered standards.
- If you can avoid it, don’t spend the night in town. I can’t tell you how good I felt when I did an in and out day, like I was being a responsible, level-headed person. If you’re heading into a place for resupply and other errands, hitch back out when you’re done and spend the night on trail. This way, you’re avoiding the temptation to spend money on lodging for the night, and then more money in the morning by going out to breakfast or just lingering about at a coffee shop.
That just about wraps it up folks; stay tuned for more PCT related content and my future plans for thru-hiking. I hope you all find this post informative, and a big congrats to the PCT Class of 2019!
Happy trails,
-Artemis


I’m guessing the trail shoes still win out over walking boots considering things like ankle support? Seems like something you might need when crossing that must wild terrain?
LikeLike
Yes, but I’ve never needed much ankle support in the past. From my experience, boots are stiff & uncomfortable, and cause me severe pain in the way of blisters due to not being breathable. I much prefer the flexibility in trail runners. This is just my personal opinion, of course. But when marathon-ing long days I’d much rather have a soft shoe over a rigid one, even in the rugged terrains of the High Sierra & Washington State.
LikeLike
I’ve got to say I’m pretty sold on getting a pair just for my regular hiking, they look super comfy! I agree with boots being very rigid!
LikeLike
Great, I’m sure you’ll be very pleased with them! They’re ugly shoes, but they’ll get you through;)
LikeLike
Ugly is a big selling point for me actually haha!
LikeLike